Wednesday, February 20, 2013

What's your eye shape?

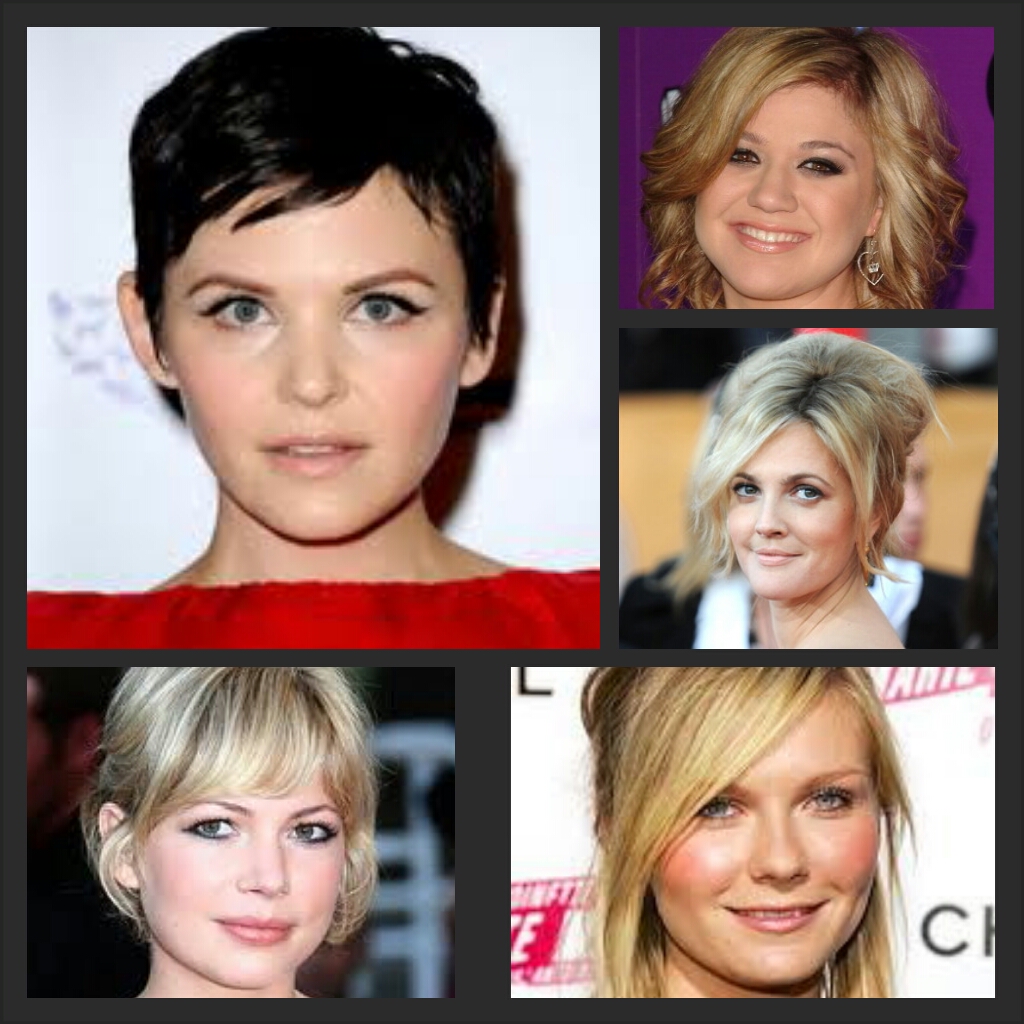
We've talked about the different face shapes there are and the makeup tricks you can use, to bring out the best in them. Knowing your eye shape is just as important, especially if you like doing loud eye looks and bringing focus to your eyes. So keep reading, to find out, what the different shapes are and everything else you should know about them.

You could have a combination of two or three shapes (more on that below) and small or big eyes with any of the following shapes.
To open up small eyes, use a white or nude coal eyeliner on your lower waterline. If you want to use black liner, apply it softly under the waterline, otherwise your eyes will appear even smaller. Still it's better to use black eyeliner only on the upper part of your eyes.
To lengthen small eyes, a subtle cat eye, is the best option. With a liquid liner start a thin line almost from the inner corner of your eye, going outwards. Once you get to the outer corner, slightly curve the line upwards and out.
If you want to "shrink" large eyes, do the opposite of everything I told you about small eyes. Black liner is your best friend. Apply it on your upper and lower waterline. You can also add more around that, for a heavier look.
To lessen the length of your eyes, use black liner on the inner corner.

Now what's your eye shape?


 Standard


Most people have a variation of the standard eye.
With this eye shape you can see the eyelid all the way across, when the eyes are open. The eyes are not too far apart and not too close together.
If you have a standard eye, you can do any eye look you want, because the shape of the eyes is balanced. Still it's always flattering, if you use a slight amount of a light shadow on the inner corner of your eyes.


Almond & Hooded


Almond (also called Asian) eyes are another shape you can do anything you want with. You can use shimmer, dark colors or anything else you want and go even as far as the brow.
A cat eye is very cohesive with almond eyes and really brings out their shape.


Hooded eyes can be very similar to almond eyes. With this shape, the lid is completely or partially covered. This can occur through aging, or be your eye shape since birth.
 The "rules" are basically the same they are with almond shaped eyes. You can extend the shadow all the way to your brow, but if it's hooded because of aging, it's better not to use shimmer in this area, because it will draw unwanted attention.
Another thing you can do is to use a light shadow on the inner corner of your eyes to open them up, because hooded eyes tend to look small.


Close set


Close set eyes means, that the eyes are closer together to the bridge of the nose.
They could also be any one of the two shapes above. For any pair - "close set-almond" or "close set-hooded" - use a combination of the tricks of both the shapes.
If you want to bring close set eyes further apart, avoid dark colors on the inner corner of your eyes. Also draw the eyeshadow or eyeliner out of the outer corner of your eyes, going slightly upwards.


Wide set


Wide set means that the eyes are further apart, to the sides of the face.
With wide set eyes, you can have any of the two shape pairs too - "wide set-almond", "wide set-hooded". Use a combination of the tricks of both shapes, to have the best result.
With wide set eyes, you can do whatever you want, but have in mind that the further you draw your shadow outwards, the more you'll pull the eyes apart.
To bring wide set eyes closer together, bring darker colors all the way to the inner corner of the eyes.


Down turned


If you have a down turned eye, it means that the outside corner of the eye is pulled downwards, sometimes looking sad.
For that type of shape, when you're applying eyeshadow, stop slightly before the eye starts to droop. Don't worry, it won't look weird, but when you apply mascara, it will give the illusion of a lifted eye. Another way to do that, is to do a cat eye with a liquid liner, or even just apply your shadow going upwards on the outer corner of the eye, giving a very subtle cat eye result.


Deep set


With deep set eyes the eyelids go way back, creating dark shadows over and around the eyes. There's also usually a big part of the lid exposed.
You can have a combination of deep set eyes and any one of the shapes already mentioned, except from hooded. You can even have triple combinations, like "deep set-close set-almond" eyes. The best thing to do is to use the middle ground of the tricks of the two or three shapes.
If you have deep set eyes, avoid dark colors on the lid - unless you're doing a smokey eye, which is balanced -, because they will enhance the shadows over your eyes and make it look like they are even further back. So try to keep the eyelid light and shiny, to bring it out.


 Protruding


Protruding eyes are usually large and tend to come out (protrude).
You can have all the different shape pairs with protruding eyes, except of course of a "protruding-deep set" eye. Like with the deep set eyes, you can also have triple combinations. Use the tricks of the two or three different shapes in balance, to get the best result.
With protruding eyes you can generally do anything you want, but if you want to minimize the effect of it, use mat dark colors on the lid. Light and shimmery colors would bring the eye out ever more.


Now that you know, have a great time doing your eye makeup accordingly, to bring out the best version of your eyes!

Friday, February 15, 2013

Denim on Denim!

Denim is the most known and used fabric of the last decades. It' s mostly used on pants (jeans), but from time to time, depending on the different fashion trends, you can see it everywhere! There are denim shorts, skirts, dresses, shirts, jackets and even accessories...
For the most part, mixing denim items has been considered a crime of fashion, but lately, if you do it right, it's a big fashion "do". If you combine the right denim colors and finish the outfit with the right accessories, you'll end up with a great casual look.


I chose a dark pair of jeggings and matched them with my denim button up shirt. To incorporate another of my favorite trends -metallics, I added a loose golden knit sweater. I rolled up the sleeves of the sweater and the denim shirt to give an even more laid back vibe.

For shoes I wore my favorite Dr. Martens lookalikes, that look amazing with almost any day outfit and give a subtle rock feel.

The jewellery I chose, is quite simple: A pair of red rose stud earrings and for arm candy, a studded bracelet paired with my red swatch watch.

I also kept my makeup simple, with some hot pink lip stain, a hint of eyeshadow eyeliner and mascara.

On my nails, I have this golden based leopard print design. Leopard is one of my favorite patterns in fashion, because it provides an elegant but also rock and fun element.
You can watch a tutorial on this nail design here.


Even though the fashion "police" allows and admires denim combinations, doesn't mean that it's everyone's taste. Each one has their own style, that shouldn't be determined from what is "hot" and what not. The different trends and fashion guidelines are there, merely to give inspiration and ideas.

Monday, February 11, 2013

Valentine's Makeup Tutorial!

If you're in a relationship, Valentine's Day is a sweet, romantic, loving day, filled with laughter and hugs. But it could also be stressful, because of the obsession, that the day should be perfect. Perfect date, gift, outfit, makeup...
If you're single, there are two ways you can go. You can either stay at home, with a great chick flick, tissues and lots of chocolate, or you can put on your favorite, most sexy dress, great pumps, get your single girlfriends and go out, to show them what they're missing!

Both, single and taken, though, need a makeup look, that is flawless and eye-catching.
That's what I'm gonna show you step by step, in this tutorial.


1. Put on your favorite foundation, concealer and powder, to create the perfect base for your makeup.

Sephora Mattifying Compact Powder No30 Medium "Sand"
Avon Colortrend Concealer "Light"
Maybelline BB Cream "Light"

 You can also contour and highlight, following the tips I gave you in the "Makeup Tips based on your Face Shape" post.

Seventeen Finishing Powder No02 "Pearl"
Sephora Mattifying Compact Powder No50 Deep "Mocha"


2. If you want, you can fill in your eyebrows with a matte brown eyeshadow, that almost matches your hair color. This step will give more definition to your features.

Sephora Eyeshadow Palette No09 "Almost Nude"


3. Take a light pink (matte or sparkly) eyeshadow and cover the whole lid and crease.

Sephora Eyeshadow No28 "Sweet Candy"


4. Take a rose gold or copper gold shadow and cover the outer 1/3 of your eyelid, up to the crease.

Bourjois Eyeshadow No52


5. With a black coal eyeliner line the upper waterline and 2/3 of the lower waterline.

Avon Super Shock Eyeliner "Black"


6. With a black liquid eyeliner create a cat eye. Start from the inner corner of the eye, go all the way out and create a tip, that you will then connect to your basic line. You can do this as thin or as thick as you prefer, but try to keep it subtle.

Sephora Long-lasting Liquid Eyeliner No01 "Black"


If you're not comfortable using liquid eyeliners, your can use your coal liner. Sharpen it well, so that you'll be able to get more detail.


7. Curl your lashes and add a lengthening and volumizing mascara.

Maybelline Falsies Volum' Express Mascara "Black Drama"


8. Add some natural pink blush.

TommyG Blush on Satin No512

I did the blush first as you can see.


9. It's time for the lips!
a) If you're "taken" and preparing for a date, put on some tinted lip balm, in a natural light pink color.

Korres Mandarin Lip Butter "Purple"


b) If you're single, put on your favorite bright red or fuchsia lipstick and some lip gloss to give it a shiny finish.

Erre Due Fullcolor Lipstick No02


 10. Finally, put on a great smile and have fun!


Happy Valentine's Day

Wednesday, February 6, 2013

Valentine's Treats Recipes!


Chocolate covered Strawberries


 You will need:
Strawberries (of course)
Dark or Milk Chocolate (depending on your taste)
White Chocolate
Vegetable Oil (optional) 

The first thing you need to do is wash the strawberries and let them dry. If they're not dry by the time you dip them into the chocolate, it won't stick to them.
Once your strawberries have dried, you can start melting the chocolate - not the white chocolate, not yet. You can use your microwave oven or a double boiler. Be really careful while melting the chocolate, because it can change in seconds from melted to burned. 
You could add some vegetable oil to your chocolate, once you start melting it. It has no taste, but will give a nice shine to the chocolate, once it has hardened again. It will also prevent the chocolate from cracking.
Once your chocolate is melted you can start dipping the strawberries. If you want you can pin toothpicks on the top of each strawberry, to make dipping them - and eating them afterwards - easier. Dip each strawberry about 2/3 into the chocolate and then lay them on wax paper, so that they won't stick.
When all strawberries are covered, let them cool in room temperature for about five minutes. Then you can start melting the white chocolate. 
Once it's melted you can use a fork to drizzle it on your strawberries. This will create a great decoration and will give extra sweet taste to your chocolate covered strawberries. You don't have to be precise. Just dip the fork in the white chocolate and then move it back and forth over the strawberries.
Once you're finished let them cool in room temperature for five minutes and then put them in the fridge for another 15 minutes. The reason you need to leave them in room temperature first is so that the chocolate won't crack from cooling too fast.
After that you can share them with your loved one!


Chocolate Truffles


You will need:
Dark Chocolate
White Chocolate (optional)
Double or Thickened Cream

First you will need to melt 200g of the dark chocolate on a double boiler, with the cream mixed in (90ml). If you want, you could also add two tablespoons of your favorite spirit or liqueur to that mixture. While melting, mix the ingredients together.
Once the chocolate has melted, leave it in room temperature for a couple of hours, until it sets. After that, using a teaspoon, take small portions of the mixture and roll them into truffle balls.
Then put them in the fridge for a few minutes and start melting another 200gr of the dark chocolate. When it melts, bring the truffle balls out of the fridge and dip them into the melted chocolate. You can use two forks for that process -one to pinch the truffle balls and the other one to help unpin them. Lay the chocolate covered truffles on wax paper, to prevent sticking.
You could put them in the fridge to cool for about 20 minutes and just enjoy them after that, or you could let them sit in room temperature for five minutes and then melt some white chocolate, to drizzle on them for a nice design. If you decide to add some white chocolate, after you decorate your truffles, put them in the fridge for 20 minutes to cool.
You could also do other variations of this recipe. You could use milk or white chocolate instead of black for your outer coating, or you could roll the truffle balls in cocoa (without putting them in the fridge first!).
Either way, when you're done, you can enjoy them with that special someone!

Strawberry Shortcake


You will need:
Flour
Sugar
Baking Powder
Baking Soda
Salt
Whipping Cream
Strawberries
Whipped Cream

First you will need to mix the ingredients for your shortcake. Add 2 cups of flour, 2 teaspoons of baking powder, 1/4 a teaspoon of baking soda, 2 tablespoons of sugar, 3/4 a teaspoon of salt and 1,5 cups of cream in a large bowl and mix them with a whisk. The mixture will soon become thick and you may need to continue mixing with a large spoon or a spatula. Once it reaches the consistency of dough, stop mixing. It's really important to not overmix.
Get a pan and oil it's surface, so that the shortcake won't stick in it once it's baked. Put the dough in the pan and spread it out evenly, so that it will cook evenly. Then you can put it in the oven for 20 to 30 minutes in a temperature of 200 (Celsius).
While the shortcake is baking, cut the strawberries in small pieces, put them in a bowl and add sugar. You can put as much sugar as you wish, depending on your taste. The sugar will dissolve, while drawing out the moisture of the strawberries. This process will create a sweet tasting liquid around them. Stir the sugar into the bowl of strawberries and then leave it in room temperature until the shortcake is ready.
Once your shortcake is done you can cut it in pieces, to serve. Slice each piece in half horizontally and add strawberries in between as well as on top.
Add some whipped cream and you'll have a great sweet treat for you and your valentine!

Friday, February 1, 2013

Makeup Tips based on your Face Shape!

Each and every one of us is different, we have our own unique features. But even though there's no human shape identical to another, we can categorize the different shapes in just a few basic classes.

Today we're gonna talk about four of the most common face shapes and how you can bring out the best in them with some easy makeup tricks.


Round


If your face is wider on the cheek level and your forehead is almost as wide as your jaw line, than you have a round shaped face.
For this type of shape you will need to create an illusion of edges, that will bring depth and balance to your features.
First of all you should avoid circular moves, while applying your makeup. Straight horizontal or vertical lines are the best way to go.
By contouring under your cheekbones in a triangular shape, with its base on the level of your ears and it's tip under the outer corner of your eyes, you will create a shadow, that will thin your face. Also contour under the jawline and slightly on the sides of your forehead.
 With your highlighter accentuate your cheekbones, the middle of your forehead and your chin.
The best eyebrow shape for a rounded face shape is an arched brow, that is not too thin or thick.
When doing your eye makeup, bring the shadow and eyeliner from the inside out, slightly longer, than where your eyes end, to elongate them and thin your face.

Interesting Fact: A round shaped face keeps it's youthfulness longer than any other!


Square


If your face has almost the same width from your forehead to your jawline and your cheekbones are drawn out, then you have a square face shape.
The key for this type of shape is to soften the angles and corners, to balance out your features.
To achieve that use circular moves while applying your makeup.
With your contour go over the sides of your forehead almost all the way down to your jawline, to elongate and thin the face. To enhance the effect of your contour, highlight the middle of your forehead, the line of your nose and your chin.
Apply your blush slightly under your cheekbones. It should be more intense on the outer side and washed off as you go in.
The best eyebrow shape for a squared face, is a full and slightly angled and arched brow.
Full lips in a vivid shade will bring great balance to your face shape.

Interesting Fact: Most of the (so called) most beautiful models, have a squared face shape!


Heart


If you have a wide forehead but narrow or pointed chin, than you have a heart shaped face.
For this type of shape you will need to create shadows and highlight, in a way that will give the illusion of a thinner forehead and wider jawline.
Contour the sides of your forehead and the under the edge of your chin.
Then slightly highlight the middle of your forehead and your nose line. You can also highlight under your lower lip line.
Avoid a lot of blush on your cheekbones, because they're already accentuated.
Natural eyebrows are great for a heart shaped face. Follow your brow shape and just pluck any excess hair.
Bring attention to your lips by using a lip gloss with a lot of shine.

Interesting Fact: Most heart shaped faces have a widow's peak. Kourtney Kardashian is a perfect example for this face shape!


Oval


If your face is slightly wider at the top than the bottom and you have a slightly rounded jawline, than your face is oval shaped.
On this type of face shape the cheekbones are not accentuated, so you'll need to contour and highlight accordingly to bring them out.
With your contour create a shadow under your cheekbones and the sides of your nose. Then use your highlighter to lighten up the center of your forehead and your nose line.
Use a vivid colored and slick blush on your cheekbones to tone them even further.
The best eyebrow shape for oval faces is a natural and slightly arched brow. Just follow your eyebrow shape, correct the arch and clear any excess hair.
You can either draw attention to your eyes with a dark smokey look, or a cat eye, or to your lips by using a bold color and some lip gloss.

Interesting Fact: Oval shaped faces are considered the most balanced and beautiful!

Wednesday, January 30, 2013

Studs and Spikes Everywhere!


I was having a conversation with a girlfriend the other day and we were talking about, how every single fashion item, that is out there right now, has some type of studs on it (it was a very deep conversation topic).
It's true, you can find anything, from clothing items, like shirts, jeans, jackets etc, to accessories, like belts, bags, necklaces... and even other random stuff, like phone cases or key chains.


The fashion world seems to be obsessed with studs and spikes and so am I! Without even noticing, I ended up with a huge number of studded clothing items and accessories and I still want more.


Gold, silver or copper, pyramid shaped, flat or spiked, studs provide a rock element to an outfit.
Depending on how edgy your style is, you can go flashy, with lots of noticeable studs, or subtle.
I usually prefer to only wear one studded item, to give just a slight rock vibe to my look and not go overboard.


Pair studded items with leather (a jacket or leggings) and biker boots, army boots, or Doc Marten's for an unforgettable grunge look!
Another great pairing is to wear them with a well fitting blazer, to create a very elegant contrast.


Friday, January 25, 2013

Lace & Leather

 Mixing contrasting patterns, colors or materials, can give a staggering outcome!
This time I chose to combine the "romantic" and "girly" lace with the "rock" and "grunge" leather.

With minimal makeup and jewellery, this outfit is very natural, but at the same time edgy and daring. The color scheme I chose consists of basic colors, such as beige and black.
The vivid colored belt brings the outfit together in a very lively way.


The lace nail design is a cute little detail, that compliments the look and completes it.
The colors I chose are beige and white, to go along with the overall color combination.
It's a very sweet and dainty manicure.


Don't hesitate to try any combinations, that you have in mind, because you never know how interesting the outcome will be!